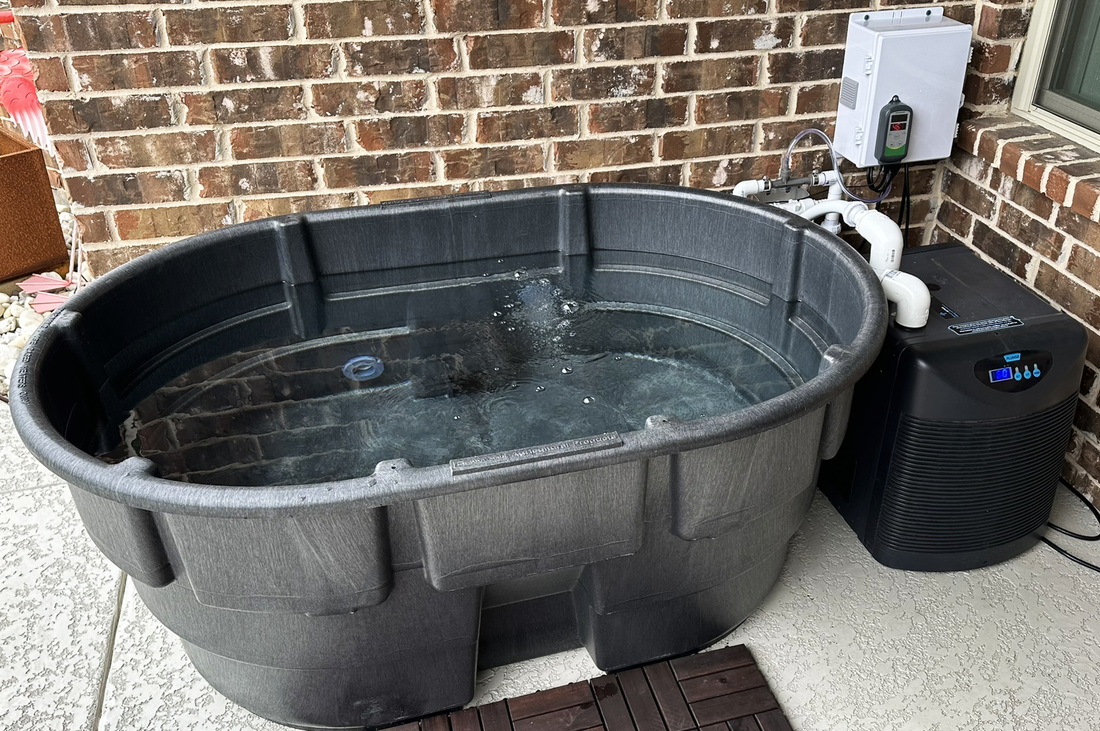
Build Your Own DIY Cold Plunge: The Basics

Are you looking to take the plunge into cold therapy but want to build your own cold plunge tub instead of purchasing one? You're in the right place! Building a DIY cold plunge can be an affordable and rewarding project, and we’ve got the resources to help guide you through the process. From selecting the right materials to maintaining your cold plunge, we’ll cover everything you need to know. Whether you're interested in creating a custom cold plunge at home or just seeking the best cold plunge parts, this guide will make sure you’re on the right track.
Why Build a DIY Cold Plunge?
Cold water therapy is known for its incredible benefits: improved recovery, better circulation, and reduced inflammation. However, pre-made cold plunge tubs can be expensive, and building your own can be a cost-effective alternative. With some planning and the right components, a DIY cold plunge can be customized to fit your space and needs.
Key Materials for a DIY Cold Plunge
Choosing the best materials for your DIY cold plunge is crucial. You’ll want something durable, insulated, and large enough to immerse your body. Many DIY enthusiasts use large stock tanks, but you could also repurpose bathtubs, wine barrels, or other large containers. Insulated cold plunge tubs are preferred for their ability to maintain cold temperatures for longer periods.
Cold Plunge Cooling System Installation
One of the most important elements of any cold plunge is the cooling system. While some people choose to add ice manually, a more effective and consistent option is installing a cold plunge cooling system. There are various options out there—from aquarium chillers to commercial-grade coolers—each offering a different price point and cooling capacity.
Look for a chiller that match your tub size and temperature preferences. Cold plunge temperature control is critical for ensuring you get the optimal benefits of cold water immersion. For DIY cold plunges, a good pump and filtration system will help keep the water clean and circulate it to ensure even cooling.
Cold Plunge Filtration and Sanitation
Water sanitation is a key consideration for any homemade cold plunge tub. The last thing you want is to be soaking in murky or bacteria-ridden water. Installing a cold plunge filtration system will help keep your water fresh and clean. You may also want to consider using ozone generators, keeping in mind that they require a venturi to inject the ozone gas into the water. We recommend ozone because we believe it is one of the easiest ways to keep your water clean with minimal effort. Regular maintenance, including changing the water and cleaning filters, will ensure that your DIY cold plunge stays in top condition for months to come.
How to Build a Cold Plunge on a Budget
Creating a cold plunge doesn’t have to break the bank. For those building a cold plunge on a budget, there are plenty of affordable cold plunge alternatives available. You can find affordable parts kits and insulation solutions, and even repurpose containers like troughs or freezers for your tub. Homemade cold plunge setups can be just as effective as expensive models with the right planning and creativity.
The key to a budget-friendly cold plunge is finding the right balance between cost and quality. For example, choosing a stock tank or chest freezer for your base tub can save money, while focusing on high-quality hose, PVC fittings and a reliable pump will ensure the longevity of your cold plunge.
Setting Up Your DIY Cold Plunge
When setting up your DIY cold plunge, plan out where you’ll place it—indoors or outdoors. The setup can vary depending on the location. Outdoor cold plunge setups may require additional insulation, while indoor setups will need good drainage. Make sure you have all the necessary cold plunge accessories and fittings, such as hoses, pumps, and covers, to streamline the installation. Keep in mind that components that are not insulated will condensate.
It’s important to follow DIY cold plunge setup instructions carefully. Installing your cooling system, pump, and filters correctly from the start will save you time and hassle down the road. A well-planned cold plunge will be easier to maintain and more effective in the long run. In future posts we will go into the details of how building your DIY cold plunge.
Tips for Insulating Your DIY Cold Plunge
To keep your cold plunge at an optimal temperature, insulation is key. A well-insulated tub will require less energy to maintain cold water and will ensure you get the best benefits from your cold water immersion. Consider adding foam board insulation or spray foam around the exterior of the tub. Adding an insulated cover when the plunge is not in use is another great way to maintain cold temperatures.
Conclusion
Building a DIY cold plunge tub can be an exciting and satisfying project, allowing you to customize it to your exact needs and budget. Whether you’re building a cold plunge at home or in your backyard, we’ve got the parts and soon to release guides to help you every step of the way. From cold plunge pumps and filtration systems to insulated covers, flexible PVC spa hose and fittings, Plunge Crafters has everything you need to create the perfect cold plunge experience.
Browse our collection of cold plunge parts kits, cooling systems, and accessories today, and take the first step towards cold water therapy right in your own home.

